
Игра представляет собой смесь казуального "поиска предметов" с набором мини-головоломок и пары мини-аркад. Все действия выполняются левой кнопкой мыши. Когда при наведении курсора на предмет появляется шестерёнка, то это означает, что с предметом можно провзаимодействовать: открыть или подвинуть что-то, пройти куда-то, получить новое задание на поиск предметов или порешать головоломку. При сборе предметов курсор при наведении на них не изменяется. "Собирая" мух (кликая на них), заполняем шар со знаком вопроса в правом верхнем углу экрана - после заполнения клик на шар выпускает муху-подсказку, которая кружится возле места, где надо искать предмет. Куски паззла собирать на каждом этапе необязательно, далее по тексту прохождения не будут указаны места их размещения. Если есть желание, можете их поискать - например, с помощью мух-подсказок.
Первая часть
Сначала проходим небольшую учёбу: кликаем на торчащий кусок паззла, затем на красную кнопку, затем на открывшуюся дверь, затем на лестницу без ступенек - получаем первое задание на поиск.
Все пять ступенек находятся на нижнем экране. Первая и вторая ищутся в рамках той же учёбы - нам показывают, куда кликать. Третья ступенька - чуть ниже верхней двери. Четвёртая - в печке (открываем печку возле ботинка, заглядываем внутрь, кликаем на ручку кастрюли на переднем фоне справа). Чтобы взять пятую, надо открыть трансформатор справа: кликаем на него, вводим код 713 (как получить этот код - в следующем абзаце) и забираем ручку на открывшейся двери слева.
Код 713 обнаруживается следующим образом: на втором экране в иллюминаторе видны цифры на стене. Кликаем на них - попадаем в увеличенный вид. Надо убрать все повторяющиеся цифры, кликая на них по очереди (на рисунке ниже выделены все пары). Остаются три цифры: 7, 1, 3 (треугольник) - это и есть код.
Итак, открыв трансформатор и забрав ручку слева на его дверце, кликаем на правую его часть - получаем задание найти 9 лампочек. Также кликаем на большой металлический лист слева на трёх болтах (четвёртый угол отогнут), который что-то закрывает - получаем задание найти разводной ключ. Сначала ищем лампочки. Первая - на этом же экране прямо над дверью наверх. Вторая - на втором экране, на ящике с восклицательным знаком. Дальше устанавливаем собранные ступеньки в лестницу и поднимаемся на экран выше. Третья лампочка - на бабушкином балконе, четвёртая и пятая - на торшере слева. Поднимаемся ещё выше - забираем шестую и седьмую лампочки на фонаре слева, восьмую - на самом верху флюгера. Девятая лампочка - в сундуке бабушки. Открывать его будем дальше.
Спускаемся к бабушке, кликаем сначала на сундук - получаем задание найти ключ. Затем на бабушку - видим, что она готова отдать ключ за собранный портрет. Теперь на пустую рамку на стене слева - видим, что надо собрать 25 бутылочек с кусочками портрета. Для их сбора поднимаемся наверх, кликаем на телескоп и играем в мини-игру: надо стрелять в шары, несущие бутылочки с кусками портрета. Настреляв 25, спускаемся и используем их на пустую рамку. Собираем паззл (удобнее всего, как обычно в таких случаях, начинать с углов и краёв):
После сбора портрета радостная бабушка роняет ключ от сундука. Открываем им сундук, находим в нём девятую лампочку и разводной ключ. Спускаемся в самый низ, используем лампочки на трансформатор - попадаем в головоломку. В ней надо, поворачивая лампочки с помощью четырёх поворотных центров, расположить их так, чтобы в верхнем ряду были красные лампочик, в среднем - фиолетовые, а в нижнем - зелёные. Задание несложное, решается буквально в несколько кликов - собирайте ряды сверху вниз. Трансформатор закрывается, семафор горит красным. Кликаем на рычаг с красным набалдашником - свет меняется на зелёный.
Используем разводной ключ на все три болта, держащие металлический лист слева на "стволе дерева". Кликаем на открывшийся механизм - получаем задание найти 8 угловых трубок и 7 шестерёнок. Лезем в печку у ботинка, забираем там 1ю трубку и 1ю шестерёнку. 2ю угловую трубку снимаем с семафора около рычага с красным набалдашником, а 2ю шестерёнку - слева у торчащей из земли лампочки. 3ю шестерёнку - на самом верху первого экрана, между красной кнопкой и антенной. Поднимаемся на следующий экран наверх. Открываем ящик с восклицательным знаком - забираем 4ю шестерёнку. Над дверью справа - 3ю угловую трубку. Поднимаемся ещё выше - к бабушке. В сундуке берём 5ю шестерёнку и 4ю угловую трубку - она в самом углу сундука, выглядит, как его элемент. Из крышки люка забираем большую 6ю шестерёнку. Заглядываем в шкаф - берём там 5ю угловую трубку. 6я трубка - конец перил тут же. Поднимаемся ещё выше. Последняя шестерёнка - на телескопе. 7я трубка - на его штативе, 8я - на крыше павильона. Спускаемся в самый низ и используем на вскрытый нами механизм и шестерёнки, и трубки. Теперь, когда механизм заработал, нажимаем на кнопку у основания лестницы и заглядываем в открывшийся ангар.
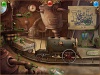
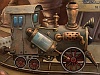
Нужно собрать паровоз из 16 кусков, разбросанных по ангару. Вот то, что берём, и то, что должно получиться:
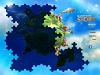
Финальный аккорд каждой части - сбор паззла мира. После первой части должно получиться так:
Вторая часть
Сначала нажимаем на плакат, составленный из вертикальных кусков изображений самолёта и яблока. Нам нужно собрать самолёт, для этого нажимаем сначала 2ю слева кнопку, затем 4ю, затем крайнюю левую. Выходим из собранного плаката, жмём на механизм над ним - получаем задание найти 3 колеса. Жмём на аппарат в кабине справа - получаем задание найти батарейку. Идём на следующую локацию налево, жмём на средний иллюминатор "батискафа" - он открывается. Жмём на него ещё раз - получаем задание найти 2 колбы. Идём ещё левее, жмём на люк в "кувшине" дважды - получаем задание найти 4 вентиля.
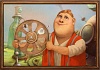
Начинаем собирать всё необходимое прямо с этой крайней левой локации. 1й вентиль - на кране слева. Идём правее. 2й вентиль - прямо посреди экрана. Открываем люк с прорезью чуть правее тележки, спускаемся вниз. Кликаем на картину-паззл на стене, собираем картину, меняя по очереди два любых рядом стоящих квадратика. В итоге должно получиться так:
Выходим из увеличенного вида картины и тут же кликаем на колесо на ней - получаем 1е колесо. Открываем нижнюю створку шкафчика слева, забираем 2е колесо. Открываем сундук, смотрим в него, берём из него 3й вентиль, 1ю колбу, 3е колесо. Открываем люк в подпол, забираем 2ю колбу. Кликнув на деда, видим, что батарейку можно получить, починив какой-то большой агрегат. Поднимаемся от деда, идём на локацию правее, в правом нижнем углу забираем 4й вентиль.
Идём на локацию левее, открываем средний иллюминатор батискафа, вставляем в него колбы - попадаем к тому агрегату, который надо починить. Принцип такой же, как с паровозом в первой части - нужно собрать агрегат из 13 кусков, разбросанных по помещению. Вот то, что берём, и то, что должно получиться:

Слева от батискафа открывается дверца, за которой - батарейка. Забираем её.
Идём на локацию левее, кликаем вентилями на люк в кувшине, попадаем в задачу с трубами. надо собрать замкнутую систему, поворачивая куски труб. Должно получиться так:

Кувшин наполнен, мост разведён. Кликаем на верхнюю часть правой бутылочной башни - получаем задание найти 4 рычага с набалдашниками. 1й - тут же, на левом берегу у моста. Идём направо. 2й, с зелёным набалдашником - у железнодорожной развилки. Спускаемся к деду, забираем 3й из кадки с цветами. Поднимаемся, идём правее, забираем последний, 4й, с красным набалдашником, возле паровозика. Возвращаемся на самую левую локацию, вставляем рычаги в верхнюю часть правой бутылочной башни - попадаем в игру, где надо повторять показываемые сигналы. Смотрим на цвета и когда очередная лампочка из ряда снизу приглашающе мигает оранжевым, повторяем показанную комбинацию. Когда заполним весь ряд, выходим из игры и, кликнув на монитор у подножья бутылочной башни, попадаем в аркаду, в которой надо управлять пароходом. Кнопки вверх-вниз - для движения парохода, в кнопку с плюсом нажимаем, когда на экране есть заграждения в виде плюсов - они исчезают. Надо проплыть до конца маршрута, избегая стенки, китов и лодки. Вот к нам и корабль приплыл.
Идём на самую правую локацию, собранные колёса вставляем в механизм над плакатом с самолётом, а батарейку - в аппарат в кабине справа. Кликаем на стрелку вверх на этом аппарате - плакат поднимается, а под ним - головоломка. Кликаем на неё - получаем задание найти 24 цветных шара и треугольник.
На этой самой правой локации 7 шаров: слева от плаката, на фоне синей большой лампы, в траве у стрелки, слева за паровозом, на конце антенны на крыше кабинки, на самой кабинке в левом из трёх слотов, на вершине какого маленького агрегата справа внизу. Идём левее, собираем ещё 6 шаров: в верхем правом наросте на батискафе, за дверцей над агрегатом с проводами внутри, за дверцей в нижней части фонарного столба (открывается нажатием на красно-белый полосатый рычаг у железнодорожной развилки) и 3 - в семафорах. Спускаемся к деду и забираем ещё 6 шаров: в шкафчике у умывальника, в сундуке, в кресле, на тарелке на комоде, на полке за верхними дверцами комода, в подполе. Поднимаемся, идём левее, забираем треугольник с парохода и оставшиеся 5 шаров: из громкоговорителя на кувшине, 2 - с левого пристроя к кувшину, 2 - с фонаря. Возвращаемся к головоломке на самом правом экране, используем на неё треугольник и шары.
Кликаем на головоломку. Для её решения надо поменять местами шары таким образом, чтобы на внешней окружности были все зелёные, на среднем - все синие, на внутреннем - все оранжевые (видно по ободкам лунок для шаров). Для обмена используем единственную пустую лунку и повороты двух внутренних окружностей.
Кликаем на открывшийся лифт, собираем вторую часть паззла мира:

Сюжет полной версии игры Теория Крошечного Взрыва на андроид:
Однажды на одну маленькую планету свалился крохотный метеорит. Но даже небольшого столкновения вполне хватило, чтобы нанести планете необычайно масштабные разрушения. Игрок должен выполнить особо важную миссию – восстановить свой дом вместе со всеми ее энергосистемами и коммуникациями. Для этого предоставляются все необходимые запчасти, включая лампочки, шестеренки, болтики и прочие детали. Успех миссии напрямую зависит от смекалки и усидчивости игрока, ведь для решения головоломки придется немного попотеть. Игра выполнена в стиле «Поиск предметов». Но тут не придется решать скучные головоломки в неприметных местах. Атмосфера всего приложения весьма динамична, а каждый новый этап готовит игроку массу приятных сюрпризов. Помимо обычного поиска предметов игроку предлагаются головоломки и задачки на логику.


Однако перед тем как решить задачу необходимо будет ознакомится с правилами. Следует также отметить, что приложение полностью лишено любого текста, оно интуитивно понятно, поэтому поиграть в игру сможет даже ребенок, который не умеет читать. Всего в игре пять глав и три десятка головоломок. Прохождение каждой сопровождается тщательно прорисованной графикой, веселой музыкой и уникальным, захватывающим сюжетом. Каждый новый уровень кардинально отличается от предыдущего. The Tiny Bang Story для Android попала в десятку наиболее популярных приложений по версии Steam и BigFish, Gamehouse, а Gizmodo признал ее как «Лучшая игрушка недели». Следует обратить внимание на то, что приложение нуждается в дополнительной загрузке кэша. Первые запуски рекомендуется выполнять при включенном Интернет соединении. В соответствии с типом устройства объем свободной памяти должен составлять от 50 до 100 Mb.
Прохождение Теория Крошечного Взрыва
- Как пройти игру The Tiny Bang Story? смотрите видео: (можно выбрать любой уровень)
Часть первая В самом начале игры нам предлагают пройти что-то на подобии обучения. Тут и там будет появляться иконка в виде компьютерной мыши, которая будет показывать, на какую кнопку...
Часть первая
В самом начале игры нам предлагают пройти что-то на подобии обучения. Тут и там будет появляться иконка в виде компьютерной мыши, которая будет показывать, на какую кнопку надо жать. Для начала на первой локации (снизу башни), собираем все доступные кусочки мазайки. В дальнейшем они понадобятся, чтобы складывать картину мира в конце каждой части. Собрав, следуем указаниям иконки в виде мыши, то есть поднимаемся на второй этаж, где сначала также собираем мазайку, а затем щелкаем на лестницу без лесенок. Видите иконку с изображением ступеньки, которая появилась в правой части экрана? Так вот это первое задание в игре. По сути многие задания сводятся к тому, чтобы собрать определенное число определенных предметов, а потом применить их там где надо. Так вот первое задание именно такое: нужно собрать пять лесенок. Первые четыре находятся в следующих местах: на иллюминаторе на втором этаже, на галоше на первом этаже, под дверью на второй этаж и в печке (находится рядом с галошей, тут же можно найти несколько кусочков паззла). А чтобы найти пятую, нужно решить первую головоломку. Поднимаемся на второй этаж и заглядываем в окошко с цифрами.
По сути, тут все элементарно, на стене нарисованы, начерчены и изображены несколько цифр. Причем не обязательно в виде именно цифр, например, цифра 5 может быть изображена как игральная кость или как рука с пятью пальцами. Наша задача найти все парные цифры и оставить цифры без пар. Такими станут 7,1,3. Найдя их, спускаемся на первый этаж и подходим к трансформатору с кодовым замком. Кодом, как вы наверно догадались, будет число 713. Открыв трансформатор, мы одновременно находим пятую ручку и новое задание - найти 9 лампочек.
Найти их нетрудно, они разбросаны по всем этажам. Чтобы подняться на верхние этажи, применяем иконку ступеньки на лестницу и поднимаемся.
Попадаем в гости к бабуле (не забывайте собирать все части мозайки, они есть на каждой локации). У бабули есть сундук, который нужно открыть (для получения этого задания жмем на сундук), и есть картина, которую нужно найти и собрать (жмем поочерердно на бабулю и на пустую рамку на стене). Получив все задания, поднимаемся на крышу.
На крыше стоит огромный телескоп, в котором нас поджидает мини-игра. Ее суть в том, что нужно подбить определенное количество бутылок с кусочками картины. Ничего страшного, если вы будете попадать в другие бутылки, от этого вы не проиграете. Собрав все части картины, спускаемся к раме и применяем иконку бутылки на раму. Начнется головоломка, в которой из кусочков нужно собрать целую картину. Вот такую:
После того как соберете, жмите на бабушку, и она отдаст ключ от сундука. В сундуке можно найти кусочки мазайки, лампочку и газовый ключ (для того чтобы его можно было взять, нужно получить соответствующее задание на первом этаже. Там есть большой металлический лист, прикрепленный на три болта, нажмите на него). Если все лампочки собраны, то можно смело спускаться на первый этаж и вставлять их в трансформатор.
Нажав на открытый трансформатор, мы запустим очередную головоломку, в которой нужно расположить цвета в правильном порядке: первый ряд - красный, второй - фиолетовый, третий - зеленый. Для того чтобы долго не мучиться, выстройте верхний красный ряд, затем переворачивайте два нижних.
Применяем газовый ключ на металлический лист, откроется механизм ворот. Чтобы этот механизм заработал нужно собрать шестеренки (7 штук) и трубы (8 штук). Ищите их по всем локациям. Самые трудные места, это, возможно, труба на лестнице у бабушки, труба снизу трансформатора на первом этаже, шестеренка сверху на первом этаже. Остальные детали легко увидеть.
Итак, когда все шестеренки и трубы будут у вас в кармане, используйте их на механизм ворот и заходите в гараж. Вы столкнетесь с новым видом головоломки - с собиранием механизма. Делается это все просто. У вас есть чертеж будущего поезда, по гаражу разбросаны все детали, что смогут понадобится. Находим детали и ставим их на правильное место согласно чертежу. В конце концов, должен получиться вот такой поезд, на котором вы уедете во вторую часть.
Прежде чем начать вторую часть, нужно собрать часть мозайки, вот тут и пригодятся собранные кусочки. У вас должна получиться вот такая мозайка:
Часть вторая
Поезд привезет нас в чудный городок, в котором нас ждет много головоломок и игр. Первым делом после прибытия, жмем на плакат самолета-яблока. Нужно составить рисунок самолета. Для этого жмем на кнопки в такой последовательности: 2, 4, 1. Затем начинаем собирать задания: жмем на кабинку справа от плаката (получаем задание найти батарейку), жмем на механизм над плакатом (получаем задание найти три колеса). Идем налево, ко второй локации.
Здесь жмем на окошко в колбообразном здании (получаем задание найти две колбы). Идем налево, собирая кусочки мазайки. На третьей локации есть мост и еще одно здание в виде колбы. В нем также есть задание - найти четыре вентиля. Первый вентиль на самом здании, второй - на второй локации, примерно посреди экрана, третий - на первой локации в нижнем правом углу экрана. А вот чтобы найти четвертый, нужно спуститься к дедку на второй локации, открыть у него сундук и основательно в нем полазить. Вот именно в сундуке и лежит четвертый вентиль. Также в сундуке лежит колба, в то время как, вторая колба лежит в комнате дедка, но только в подвале.
Сам дедок предлагает нам батарейку в обмен на то, что мы починим какое-то его устройство. Кстати, в доме этого деда можно найти три колеса, которые так нужны нам. Одно колесо откроется, если мы соберем картину на стене, вот так:
Еще одно колесо в сундуке, третье - в погребе. Собранные колбы, используем на том месте во второй локации, где они и нужны. Собираем аппарат (скорее всего самогонный). За это мы получим заветную батарейку, которую тут же идем и вставляем в автомат на первой локации. Также применяем три колеса на область над плакатом, смотрим, как плакат поднимается, и за ним открывается дверь. Чтобы активировать дверь нужно найти 26 шариков и один треугольник. Если с шариками все понятно: они просто разбросаны по всем локациям, то треугольника нигде нет. Вот тут нам и пригодятся те вентили, что мы искали. Щелкаем ими в окошко на третьей локации, запустится очередная головоломка. На самом деле это уже всем до боли знакомая «водопроводная» головоломка, когда надо струю воды (в нашем случае холодного воздуха) перенести из одной части экрана в другую. В нашем случае трубы четыре штуки и ни в коем случае нельзя допустить такого, чтобы оставались разрывы. Вот как выглядит решение:
Если вы сделали все верно, то сверху загорится зеленая галочка. Мосты, соединяющие третью и вторую локацию, разойдутся (но не беспокойтесь, вы все также беспрепятственно сможете передвигаться). Смотрим на рубку с рычажками сверху, получаем задание найти несколько разноцветных рычажков. По сути их довольно легко найти: один у дедка в цветах, один на первой локации, один на второй, четвертый - на третьей. Когда все рычаги будут собраны, применяем их на рубке. Запустится мини-игра. Ее суть в том, что надо запоминать цвета, которые будут показываться в рычаге посреди экрана, а затем воспроизводить их в нужном порядке.
Когда пройдете рычаги, снизу включиться телевизор. Садитесь за него и запускайте крайне простую видеоигру, в которой всего лишь три кнопки: вверх, вниз и плюс. Смысл игры в том, чтобы провести кораблик до финиша, не врезавшись. Когда увидите блоки со значком плюса, жмите кнопку плюс.
После победы в игре, по речке приплывет кораблик, который и привезет заветный треугольничек. Взяв треугольник и собрав все шарики, идем к двери и вставляем все собранное. Запустится головоломка. Ее суть в том, чтобы поменять местами оранжевые и зеленые шарики так, чтобы зеленые стояли в зеленых ячейках, а оранжевые в оранжевых, вот так:
Решив головоломку, заходите в лифт и поднимайтесь на верхушку дерева, где вас уже ждет третья часть игры. Но конечно же перед этим нужно еще собрать мозайку. Получится вот такой рисунок:
Часть третья
Поднявшись на лифте, вы попадете в некий офис. Вокруг пока что заданий нет, есть только кусочки паззла (не забудьте посмотреть в камеру наблюдения, там тоже можно найти пару кусочков). Заходите в дверь слева, попадете в место, похожее на магазин. Разговаривайте с продавщицей, она обещает дать монетку, если вы принесете ей три яблока и повесите картину на стену. Чтобы найти картину, нужно решить головоломку, которая находится тут же в нижнем левом углу экрана. Суть головоломки в том, что нужно расположить все цвета в правильном порядке по градации, то есть от самого яркого к самому тусклому. Сделать это достаточно просто, где какие цвета должны быть показано на самой головоломке. Решите, получите картину, которую тут же стоит повесить на стену. Пора искать яблоки.
Первое яблоко - в шкафу, который стоит в офисе. Садитесь в лифт и поднимайтесь выше, попадете в комнату с различной вычислительной техникой. Самым первым в глаза бросается некий золотой компас, чтобы его использовать нужно, найти звезду (она находится в офисе на столе, который можно увидеть только через камеру наблюдения). Если звезда уже у вас, вставляйте ее в компас и расположите звезды как показано на скриншоте:
После этого компас откроется, внутри покажется дешифратор. Он понадобится нам при расшифровке документов, лежащих на столе неподалеку. Итак, берем дешифратор и смотрим в документы. Выставляем дешифратор вот так:
Думаю не сложно догадаться, что пароль снизу будет 3132. Ведь первые цифры найдены по принципу 5-2=3 и 8-7=1. Следовательно, 4-1=3 и 7-5=2. Чтобы убедиться в правильности пароля, нужно попробовать его ввести на аппарате, который стоит правее компаса. Но вот незадача, аппарат без тумблеров не работает. Стоит найти 4 тумблера (в шкафу в офисе, на прилавке продавщицы, на улице, если выйти в правую дверь в офисе, ну и, наконец, в самой комнате вычислений за столом). Если вы нашли все 4 тумблера, вставляйте их в аппарат и вводите код 3132. Получите второе яблоко.
Справа стоит огромный телевизор, если его включить, то запустится видеоигра, в которой нужно провести самолетик через препятствия. Когда самолетик прилетит на посадочное место, спускайтесь вниз и выходите на улицу. Вы увидите, что самолет на самом деле прилетел и сел на посадочное место. Тут же на улице, есть третье яблоко (наверху, в гнезде) и головоломка, в которой нужно крутить планеты так, чтобы они выстроились по цветам: желтый, синий, фиолетовый. После решения головоломки, откроется окошко справа, в которое нужно будет принести монетку. Ну а монетку, мы получаем у продавщицы, если отдадим ей яблоки и картину.
Итак, если монета у вас в кармане, отдайте ее в окошко и щелкайте на самолетик. Чтобы полететь, нужно собрать все посылки (12 штук) и положить их в самолет. На этом третья глава будет закончена, продолжаем собирать мозайку.
Часть четвертая
Приземлившись, внимательно осмотритесь. Ход в город пока что закрыт, для того чтобы его открыть, нужно найти 12 сумок. Сумки ищем на всей первой локации, помимо этого слева есть маленькая дверка, если ее открыть, то можно попасть в небольшую комнатку. Там также находим несколько сумок и кусочки пазлов (в дальнейшем в этой же комнате нужно будет собрать игральную кость). Когда соберете все сумки, ставьте их на весы, запустится головоломка. Ее суть в том, чтобы расставить все сумки так, чтобы весы были уравновешены, то есть стрелочка должна стоять строго вертикально. Важно, чтобы стояли все сумки. У меня получилось решить эту головоломку вот так, но, естественно, могут быть и другие способы:
Жмите на зеленую галочку и проходите в город. На площади находится некий алтарь, в который нужно будет вставить четыре игральные кости (первая - в маленькой комнатке на первой локации, вторая — бардюрчик, рядом с домом, третья - на первой локации, в окошке на бутылке и четвертая - в комнате, в доме, который открывается через фреску Майа). На самом доме есть незавершенный фрагмент фрески древних Майа, чтобы открыть двери в дом, нужно собрать все кусочки фрески и сложить эту самую фреску из этих самых кусочков. Рисунок должен получиться вот такой:
Двери в дом откроются, если вы сложили все правильно.
Собирайте в доме, всё, что необходимо. На улице есть лодка, на которой вы уедете в следующую часть. Но вот для лодки нужен ключ, который есть у рыбака. Этот рыбак находится на втором этаже во второй локации, чтобы туда попасть нужно, вложить все кубики в алтарь и расставить их в правильном порядке согласно цветам ячеек и цветам костей. Когда все будет сделано верно, из середины алтаря выдвинется лестница, ведущая в дом моряка.
Моряк уже ждет вас. Он ждет, когда вы принесете несколько поплавков, чтобы собрать его игру, которая лежит на полу. Также в квартире есть другие задания: щелкайте на стену, где висит половинка карты и на самого моряка. Если собрать и сыграть в настольную игру моряка, то он отдаст вторую половину карты. Вот решение головоломки на полу:
Получите второй кусочек карты, прилепите его на место и решите головоломку с корабликами (конечно головоломка запустится только в том случае, если у вас есть все кораблики).
Решение:
Решив эту головоломку, вы наконец-то получите заветный ключ от лодки, которым незамедлительно воспользуйтесь. Лодка отправится в дальнее плавание. Конец четвертой части, собирайте очередную мозайку.
Часть пятая
Сразу после приплытия, щелкайте на стальные двери, рядом с которыми есть переключатель. Появится задание найти четыре вентиля. Первые три вентиля разбросаны по локациям, а вот четвертый придется выиграть в головоломке. Головоломка эта находится в здании, рядом с фонтанчиком. Жмите на разобранную картину, появится задание найти все плитки. Находите их и применяйте на картине, запустится головоломка. Ее суть в том, чтобы выставляя плитки одну за другой, собрать всю картину. Причем ставить плитки можно в строго определенном порядке: вокруг предыдущей плитки. Вот решение:
После решения взору откроется последний вентиль. Берем все четыре вентиля и выходим на улицу, где их и используем на стальную дверь. За дверью нас поджидает очередная головоломка, в которой нужно правильно расположить вентили. Важно, что они должны находится на одной трубе. Решение:
Жмите на зеленую галочку и идите к фонтану, из которого уже исчезла вся вода. Берем ключ, которым открываем большую дверь наверху. Эта дверь ведет во владения того, кого мы ищем на протяжении всей игры. Сам Он сидит на третьем этаже и пьет чай. Если щелкнуть на Него, то Он попросит собрать цифры и стрелочки для огромных часов. Цифры разбросаны по локациям, одна стрелка лежит в фонтане, а чтобы найти вторую стрелку нужно взломать сейф на втором этаже. Чтобы узнать шифр от сейфа, нужно подняться на третий этаж и посмотреть на шахматную доску. На ней выставлено все две шашки: на В1 и на С3. Это и будет шифром. Идите к сейфу и выставляйте В1 и С3, вот так:
В сейфе вас будет ждать вторая стрелочка, идем на третий этаж и выставляем все на свои места.
Если у вас в кармане уже все кусочки от мозайки, то самое время собрать последнюю часть паззла. После этого игру можно считать пройденной.
Разработчики оставили нам возможность переиграть все головоломки, для этого в главном меню жмем «Продолжить игру», после чего мы окажемся в комнате, в которой за столом сидят все персонажи, которые встречались нам по ходу игры. Если пройти правее, то там, на стене, висят картины с головоломками. Выбирайте нужную вам картину, играйте и наслаждайтесь.
Игра пройдена, поздравляю.
Find 4 more puzzle pieces here, then click on the ladder to see 5 rungs are missing. Take a ladder rung from the inside of the open hatch. Now click on the numbers on the inside wall and solve the matching puzzle (match all number pairs until you are left with the numbers 713). Go through the bottom door to climb back down.
Boot
Click on the large partially open panel, then collect 2 more ladder rungs. Open the furnace door, then click to look inside. Find 3 puzzle pieces and 1 ladder rung, then back out of here. Click on the panel on the switch to the right and enter the number 713. Take the ladder rung from the inside of the switch panel door, then click on the open panel to see you need 9 light globes. Take the light globe from over the top door, then press the top red button and climb up again.
Tree
Take the light globe, then use your ladder rungs on the ladder and climb up again.
Apartment
Find 7 puzzle pieces (one in the cupboard on the right) and 3 light globes. Click on the locked chest and the empty picture frame, then go upstairs.
Lookout
Find 4 puzzle pieces and 3 light globes. Click on the telescope then pop 25 sets of balloons that are holding flasks with pieces of canvas. Back out of this game and go back downstairs.
Apartment
Use your pieces of canvas on the black picture and solve the jigsaw puzzle. Pick up the key that the old lady drops and use it to unlock the chest. Inside, take the 2 puzzle pieces, light globe and wrench. Go all the way down to the ground.
Boot
Use your wrench on the 3 bolts to open the large panel - now you need to find 8 pipes and 7 gears. Pick up 2 gears and a pipe from here, then open the furnace door and get another gear and pipe. Use your light globes on the switch panel on the right and rotate the globes so they are red, purple and green from top to bottom. Now go back up.
Tree
Take a pipe, and open the alarm panel to find a gear. Continue up.
Apartment
Find a gear and pipe in the room, another gear and pipe in the chest, and yet another pipe from the cupboard. Head upstairs.
Lookout
Find the last gear and 2 pipes, and head down to the ground.
Boot
Use your gears and pipes on the open panel, then press the bottom red button and head in through the opening to find a dismantled train. Correctly place the 16 train parts using the diagram provided, then go back outside.
Chapter 2
Tree Trunk
Find 7 puzzle pieces, then click on the open elevator mechanism to see you need to find 3 wheels. Now click on the sliding screen panels and change them to show the picture of an airplane (from the starting position press buttons 2, 1 and 4 from the left). Now go left by clicking on the blue arrow.
Laboratory
Find 5 puzzle pieces, then open the round glass door to the lab and click inside to see you need to find 2 flasks. Continue left.
Bottles
Find 5 more puzzle pieces, then open the hatch and click inside to see you now also need 4 handles. Pick up 1 valve handle then return to the right.
Laboratory
Pick up another valve handle, then open the grey cover on the ground on the right and head through.
Underground House
Find 5 puzzle pieces in the room. Open the top cupboard and get another puzzle piece. Open the bottom cupboard and take a wheel. Open the trapdoor and look inside, then take a flask and another puzzle piece. Open the chest and look inside, then take a wheel, the last flask, a valve handle and the last puzzle piece. Click on the picture on the wheel and rearrange the tiles, then take the last wheel from the picture. Now climb back up the ladder.
Laboratory
Open the round glass door again and use your flasks on the vat. Correctly place the 13 machine parts using the diagram provided, then go back outside. Head right.
Tree Trunk
Take the last valve handle. Put your wheels in the tree"s mechanism, then try pressing the elevator button but you need a battery. Return left.
Laboratory
Take the battery and head back to the right.
Tree Trunk
Insert your battery and press the elevator button. Now click on the door to see you need to find 24 balls and a triangle button. Pick up 7 balls from here before going left.
Laboratory
Pick up 3 balls from out in the open, and find another 3 balls inside small hatches. Head down.
Underground House
Pick up 2 balls from out in the open, 1 in the top cupboard, 1 in the chest, 1 in the medicine cabinet and 1 beneath the trapdoor. Climb up again and go left.
Bottles
Find 5 balls, then use your valve handles on the controls. Now join all the pipes together so the gas flows without any leaks. After you are done, click on the glass dome at the top of the right bottle to see you need 4 levers. Pick up the lever from the ground on the left, then go right.
Laboratory
Pick up the lever here, then go down.
Underground House
Pick up the lever, then go back up and right.
Tree Trunk
Take the lever, then go all the way back to the bottles.
Bottles
Use the levers on the glass dome and complete the matching patterns puzzle, then go back outside. Look at the television and navigate the ship through the obstacles in the mini-game (destroy the green blocks with the + button on the left). Take the triangle button from the ship that arrives. Head all the way to the right.
Tree Trunk
Use your triangle button and balls in the door, then rearrange the balls so the orange are in the middle, then blue and finally yellow on the outside. Head through the open door.
Chapter 3
Lobby
Find 4 puzzle pieces, then click on the security camera and find 2 more puzzle pieces. Open the door to the left and go through.
Apple Store
Find 7 puzzle pieces, then click on the empty frame on the wall to see you must find a scroll, and open the drawer of the display cabinet to see you must find 3 apples. Now click on the vending machine at the bottom left. Rearrange the colors from brightest to faintest in the color order indicated. Take the scroll from the machine when you are done, and put it in the frame on the wall. Head right.
Lobby
Pick up the apple from the bookshelf, then continue through the right door.
Ledge
Find 6 puzzle pieces, and an apple in the nest at the top. Now click on the map on the wall to see another mini-game; solve this by clicking the sides of the map as follows: left, right 3 times, left, right 3 times, left, right, left, right 3 times. Click on the ticket counter to see you need a coin, then head left.
Lobby
Click on the elevator to go up to an office.
Office
Find 5 puzzle pieces in the room, then open the cupboard on the left and get the last puzzle piece. Click on the yellow astrolabe to see you need a compass. Click on the flashing display to see you need 4 dials. Get the dial from the desk, then head down.
Lobby
Take the dial from the shelf, then look at the security camera and take the compass. Head left.
Apple Store
Take the dial from the desk. Head right twice.
Ledge
Take the dial from the side of the building. Return left and up.
Office
Use your compass on the astrolabe. Turn the big dial around in an anti-clockwise direction until all of the red lines match up. Now click on the papers on the desk. Take the cipher key from inside the astrolabe and use it on the papers. Now find a position you can place the key so a valid subtraction can be performed (the first two columns are 5-2=3 and 8-7-1). Next use your 4 dials on the machine with the flashing display, and enter the code 3132. Take the apple from inside this machine. Head down and left.
Apple Store
Use your apples on the display cabinet, then take the coin from the cash register. Go right twice.
Ledge
Use your coin on the window, then return left and up.
Office
Use the computer and play another mini-game where you must dodge the trees and planes to land your jet. When you win, head down and out to the right.
Ledge
Press the large red button and try to enter the plane, but first you need 12 packages. Find 2 packages in the open and one in the emergency panel, then head inside to the left.
Lobby
Pick up 2 packages in the open and look at the security camera to find 1 more package. Continue left.
Apple Store
Pick up 3 packages in the open and find another within the drawer on the left. Go right and up in the elevator.
Office
Pick up one package from the chair, then open the cupboard on the left to find the last package. Return down and outside to the right.
Ledge
Use your packages on the open cargo door of the airplane.
Chapter 4
Arrivals
Find 5 puzzle pieces. Click on the scales to see you need 10 pieces of luggage. Pick up 6 pieces of luggage in the open, then open the small hatch and get 1 more. Open the door at the bottom left, and inside here find 3 puzzle pieces and 3 pieces of luggage. Use your 10 pieces of luggage on the scales. Put 5 pieces of luggage on each side until you make it balance perfectly. Back out and click on the blue sign to go right.
Atrium
Find 3 puzzle pieces, then click on the central podium to see you need 4 dice. Find another puzzle piece behind the heart door, and another beneath the small right hatch. Continue right.
Dock
Collect 5 puzzle pieces and one blue die. Click on the broken circular engraving to see you need to find 4 broken pieces, then pick one up from the top of the large statue. Click on the lock tied to the boat to see you need a key, then return to the left.
Atrium
Get another broken piece of engraving from the ceiling, then continue left.
Arrivals
Get the broken piece, then open the left doors and get the last broken piece and a red die. Also open the hatch at the top of the left bottle and find a green die. Return right twice to reach the dock.
Dock
Use your broken pieces on the engraving and solve the jigsaw puzzle. Click on one of the doors at the bottom and find the yellow die and 2 more puzzle pieces, then back out and go left.
Atrium
Use the dice on the podium. To get them into the correct spots, move them in this order: red, green, blue, yellow, green, red, yellow, blue. Now click on the green lever and climb up the new ladder.
Teapot Attic
Find 3 puzzle pieces in the open, then click on the torn map to see you need a map corner and 8 boats, and then on the puzzle box to see you need 10 tops. Open the left cupboard to find another puzzle piece and a top. Open the right cupboard to find the last puzzle piece, then climb down.
Atrium
Here you can find 2 boats and 3 tops hidden in various compartments.
Arrivals
Get a boat and top from the open, then enter the small left door and find another boat and top. Head right twice.
Dock
Get 2 boats and a top from out in the open, then find another top beneath the hatch. Click on one of the doors and find another 2 boats and 2 tops. Now return left and up the ladder.
Teapot Attic
Use the tops on the puzzle box and place all the pieces to solve the puzzle. Pick up the corner of the map and use it on the torn map on the wall. Use your boats on the map - you now need to connect similarly colored boats without crossing lines; start by taking the yellow path right around the bottom, then green around the top and finally fill in the red and blue. Pick up the key from beneath the corner of the rug, then go down and right.
Dock
Use the key on the lock.
Chapter 5
Dock
Find 5 puzzle pieces, then click on the small door on the right to see you ned 5 wheels. Open the trapdoor and take a wheel. Grab another wheel from the round structure in the background. Head through the glass doors.
Foyer
Find 5 puzzle pieces and another wheel, then click on the tiled portrait to see you need to find 10 tiles, and the locked doors to see you need a key. Pick up 4 tiles, then look at the fountain and get another wheel and another tile. Head back outside.
Dock
Pick up 5 more tiles and head back inside.
Foyer
Use the tiles on the portrait and fill in the picture by starting with the middle square of 4 tiles, then working around the outside. Take the last wheel and head outside again.
Dock
Use the wheels on the right door. You need to position these on 5 points to stop all water getting from the bottom inlet to both of the right outlets. Once done, head inside again.
Foyer
Look in the dry fountain and get 2 puzzle pieces and a key. Use the key on the locked doors, then head upstairs.
Study
Find 4 puzzle pieces, then continue up the left stairs.
Clock Tower
Find 5 puzzle pieces in the open. Look at the game table and find 3 more puzzle pieces (also look at the positions of the pieces on the board). Click on the clock to see you are missing 10 roman numerals and 2 clock hands. Open the small wall cabinet and take a numeral, then go downstairs.
Study
Find 2 more numerals, then look at the safe on the left. Open this with combination B1-C3 (from the game board upstairs) and take the clock hand from inside. Head downstairs again.
Foyer
Collect 3 numerals, then look in the dry fountain to get another numeral and the second clock hand. Head outside.
Welcome to walkthrough on Gamezebo. is a point and click adventure game played on Windows or Mac, created by Colibri Games. This walkthrough includes tips and tricks, helpful hints, and a strategy guide for how to complete .
Copyright Information
This walkthrough was created by Lynne Basinet , for сайт , and is protected under US and International Copyright laws. Any unauthorized use, including re-publication, in whole or in part, without permission, is strictly prohibited.
General Information
- Game Screens
- Menu (“Pause” Button): Located at the upper left, click to access Resume, Options and Exit (to the Main Menu). You may also
- Clue (“?” Button): Located at the upper right, click to get a visual indication for what to do/where to go or a hint to solve a puzzle. Collect Fireflies to refill it.
- Puzzle Pieces: Located at the right, just below the Clue Button. It indicates the number of Puzzle Pieces you must find on the current level.
- Inventory: Located at the right, items you collect will be stored here until ready for use. Move your cursor anywhere to the right side of the screen and the Inventory will expand to show you where to use the items.

- Gameplay
- Find Puzzle Pieces on each level to advance to the next level.
- Investigate areas, objects and characters to advance the story, complete objectives, create tasks and/or find items.
- Collect Fireflies to refill the Clue button.
- Use items on objects and characters to advance the story, complete objectives and/or create new tasks.
- Complete puzzles to advance the story, complete objectives and/or create new tasks.
Gameplay and Guide Tips
- This guide assumes you’ve read the General Information, paid attention to the in-game Tutorial and/or Help features or otherwise familiarized yourself with the gameplay.
- Click on the Blue Fireflies to fill up the Clue button. They appear 2 at a time and will tend to hover near tasks you need to complete. As soon as you’ve collected 2 Fireflies, 2 more will appear. You’ll need 30 Fireflies to fill it completely. In General Areas, click on it for a visual hint on what to do next (this will empty the Clue Button). In puzzles, click on it for a visual solution or strategy (this is always available). Move your cursor to see if you can interact with something. Often this will give you new tasks and/or items to find.
- There are Puzzle Pieces located on each level, in various areas. You must collect all the Puzzles Pieces (the amount is indicated on the right, at the beginning of the level) in order to advance to the next level.
- The game begins with a visual tutorial to get you familiar with the game mechanics and elements.
- The game only uses 1 Indicator, other than your system cursor. When you mouseover something, and see a Gear, you can interact with an object.
- Some items can be clicked on; however, you may need to complete another task before you can do anything with them.
- Most areas and Puzzles/Minigames do not close automatically. Click on the Cancel Button (Red “x” or Green “check mark” to exit.
- If you exit a Puzzle or Minigame before you complete it, any items you use will be returned to Inventory. You’ll need to use them again to complete it.
- All Puzzle Pieces will be indicated in white and interactive items/tasks with numbers. All other item/area indicators will be mentioned in the text of the walkthrough, the first time it occurs. If there are multiples, of an item, the color won’t be mentioned again. Additional/Alternate colors, numbers, arrows, lines and/or letters will be used where necessary and for clarification.
Walkthrough
Adjust the Options, if you like, click on Play and create your Profile.
Level 1
Collect 5 Puzzle Pieces, click on the Red Button (1) and then click on the Open Doorway (2).

Collect 4 Puzzle Pieces, click on the Ladder (1), collect the Ladder Rung (yellow) and then click on the Wall above the Stairs (2). When complete, click on the open Doorway (3) and return to the base of the Tree.

The object is to eliminate all the numbers that can be matched with an identical number or similar object. Click on one and then click on its mate to eliminate it. The numbers that can be paired are: 0, 2, 4, 5, 6, 8 and 9 (1). The remaining numbers are: 7, 1 and 3 (2).

Click on the Panel (1), collect 2 Ladder Rungs and then click on the Furnace Door (2 – click twice). Collect 3 Puzzle Pieces and 1 Ladder Rung (3) and then click on the Switch Panel Door (4).

Click on the Dials (1) to enter the number from the Puzzle on the second level of the Tree: 7, 1, 3. Click on the Red Button (2), collect the Ladder Rung and then click on the Open Panel (3). Collect the Bulb (blue) and then return to the second level of the Tree (4).

Collect the Bulb, use the Ladder Rungs on the Ladder and then click on the Ladder.

Click on the Armoire (1), collect 7 Puzzle Pieces and 3 Bulbs. Click on the Chest (2) and the Empty Frame (3) and then click on the Stairs (4) to go up to the Roof.

Collect 3 Bulbs and 4 Puzzle Pieces and then click on the Telescope (1). When complete, click on the Stairs (2) to return to the Apartment.

The object is to collect 25 Pieces of Canvas by popping the Balloons that have Bottles containing Pieces of Canvas. Click on the Balloons (1) to collect the Pieces of Canvas (2). This is an arcade-style game, so the solution is entirely random. The Balloons will continue to rise, even after you’ve collected 25. Once the Cancel Button (3) turns from a Red “x” to a Green “check mark,” and the number you still need to collect disappears (4), you can exit.

Click on the following for a short video example of gameplay.
Use the Pieces of Canvas on the Frame (1) and reassemble the Image (2). Click and drag each piece into position. Once placed correctly they will lock into place; there’s no need to rotate the pieces. Collect the Key (yellow), use it on the Chest (3) and then click on the Open Chest (4). Collect the last 2 Puzzle Pieces, the Bulb and the Wrench (orange) and then enter the Hatch (5) and continue down to the base of the Tree.

Use the Wrench on the 3 Bolts (1 – use it 3 times), click on the Open Compartment (2) and collect the 2 Gears (pink) and the Pipe (orange). Click on the Furnace Door (3 – click twice), collect the Gear and the Pipe (4) and then return to the second level (5).

Click on the Compartment (1), collect the Gear (2), collect the Pipe and then return to the Apartment (3). Collect the Gear and the Pipe, click on the Armoire (4) and collect the Pipe. Click on the Chest (5), collect the Gear and the Pipe (6) and then return to the Roof (7).

Collect the Gear and the 2 Pipes and then return to the base of the Tree.

Use the Gears and Pipes on the Open Compartment (1) and then use the Bulbs on the Switch Panel (2). When complete, click on the Lever (3), click on the Orange Button (4) and then enter the Garage (5).

The object is to rearrange the Bulbs so that each row contains the same colored Bulb. Click on one of the Circular Arrows (white) to rotate one quadrant (yellow) of Bulbs counter-clockwise. The solution is always the same; however, the initial configuration is different each time you play. Click on the Clue Button (blue) for the solution: Red in the top row, Purple in the middle row and Green in the bottom row.

Note that your solution will probably be different.
The object is to reassemble the Train. Click and drag each piece of the Train to the correct position (1) and place according to the diagram (2).

To advance to the next Level, you must reconstruct the next area with the Puzzle Pieces you collected (1). Click and drag each Puzzle Piece into position. When placed correctly, they will lock into place. A good strategy would be to rearrange the Puzzle Pieces and work on sections separately, using the pieces that are most obvious, first. When complete, click on Continue (2).

Level 2
Collect 7 Puzzle Pieces, click on the Elevator Controls (1), the Elevator Mechanism (2) and the Screen (3). When complete, click on the Left Arrow (4).

The object is to rearrange the Panels to form a complete image. Click on the Green Buttons to flip the Panels. Click on the Clue Button for the solution image. The solution is: 2, 1 and 4, in that order.

Collect 5 Puzzle Pieces, click on the Portal (1 – click twice) and then click on the Left Arrow (2).

Collect 5 Puzzle Pieces, click on the Hatch (1), collect the Valve Handle and then click on the Right Arrow (2).

Collect the Valve Handle and then click on the lower Hatch (yellow – click twice).

Collect 5 Puzzle Pieces, click on the upper Cabinet Doors (1) and collect the Puzzle Piece. Click on the lower Cabinet Door (2), collect the Wheel (blue), click on the Trap Door (3 – click twice) and collect the Puzzle Piece and Flask (4 – yellow). Click on the top of the Chest (5 – click twice), collect the Puzzle Piece, Valve Handle and Flask (6) and then click on the Picture (7). When complete, collect the Wheel (8) and then click on the Ladder (9).

The object is to rearrange the Tiles to form a complete image (1). Click on a Tile and then click on any Tile directly adjacent to it (above, below or on either side) to switch their places. Click on the Clue Button for a solution image. When complete, collect the Wheel (2)

Collect the Valve Handle, click on the Portal and use the Flasks on the Vat (1). When complete, collect the Battery (purple) and then click on the Right Arrow (2).

The object is to reassemble the Boiler. Click and drag each piece of the Boiler to the correct position (1) and place according to the diagram (2).

Click on the following for a video solution.
Collect the Valve Handle, use the Wheels on the Elevator Mechanism (1), use the Battery on the Elevator Controls (2) and then click on the Elevator Button (3). Click on the Elevator Doors (4), collect the 6 Balls (yellow) and then click on the Left Arrow (5).

Collect the 3 Balls, click on the Handle (1) and collect the Ball. Click on the Compartment (2), collect the Ball, click on the Upper Hatch (3), collect the Ball and then click on the lower Hatch (4).

Collect the 2 Balls, click on the Medicine Chest (1) and collect the Ball. Click on the top of the Chest (2 – click twice), collect the Ball (3), click on the Trap Door (4 – click twice) and collect the Ball (5). Click on the upper Cabinet Doors (6), collect the Ball, click on the Ladder (7) and then continue to the left (click on the Left Arrow).

Collect the 5 Balls and use the Valve Handles on the Pipes (1). When complete, click on the Control Tower (2), collect the Lever (blue) and then click on the Right Arrow (3).

The object is to reorient the Pipes so the steam flows from the Valves (1) to the Pressure Gauge (2). Click on each section of Pipe to rotate it clockwise. Note that all the Pipes will be used, including the Pipe with the Pressure Gauge, depending on your starting configuration. The solution is always the same; however, the initial arrangement of the Pipes may be different.

Collect the Lever (1), click on the lower Hatch (click twice), collect the Lever (2), return to the surface and then click on the Right Arrow. Collect the Lever (3), return to the Control Tower (click on the Left Arrow, twice) and then use the Levers on the Control Tower (4). When complete, click on the Monitor (5). When that’s complete, collect the Button (purple), click on the Right Arrow (6) and then click on the next Right Arrow.

The object is to turn all the Lights (1) green. Watch the pattern of colors that appears in the Satellite Receiver (2) and click on the Levers (3) in the same order. You’ll play 3 rounds of 2, 3 rounds of 3, 3 rounds of 4 and a final round of 5. This minigame is entirely random each time you play. If you make a mistake, you will go back a round (lose the previously completed round) and have to repeat it.

The object is to guide the Ship to Open Water and the Finish Line (1), using the Controls. Use the Up and Down Arrows (2) to guide your Ship along the path, avoiding obstacles and enemies; the Ship will move forward on its own. Use the “+” Button (3) to remove Blocks. If you crash into an obstacle, enemy or block, the game will reset and you’ll have to begin again.

Click on the following for the video solution.
Use the Balls and the Button on the Elevator (1) and then click on the Doors (2). When complete, click on the Elevator Car (3).

The object is to move the Balls so that they fill the 3 outer rings, with one color in each ring. Click on the Clue Button for the solution image; note that the Green Balls shown in the solution image are equivalent to the Yellow Balls in the game. Click on a Ball to move it to an empty space and then click on a ring to rotate it. The Center Ring (1) rotates clockwise, the Middle Ring (2) counter-clockwise and the Outer Ring (3) is stationary. The initial configuration and solution are always the same.

Click on the following for a video solution.

Level 3
Collect 4 Puzzle Pieces, click on the Camera (1), collect 2 Puzzle Pieces (2) and then click on the Left Door (3 – click twice).

Collect 7 Puzzle Pieces, click on the Empty Frame (1), the Display Case (2) and then click on the Vending Machine (3). When complete, collect the Canvas (4), use it on the Empty Frame and then click on the Right Door (5 – click twice).

The object is to arrange the colors, in columns, from brightest to faintest. Click on a Square and then click on any Square directly adjacent to it (above, below or on either side) to switch their places. Click on the Clue Button for a solution image.

Collect the Apple (1 – orange) and then continue out the Right Door. Collect 6 Puzzle Pieces and the Apple and then click on the Map (2). When complete, click on the Ticket Counter (3), click on the Left Door (4) and then click on the Elevator (in the center).

The object is to reassemble the Map so all the colors are in their own sections. You can only click on the outer sections, on the Left (1) and the Right (2). The Left side rotates clockwise, one-half turn and the Right side rotates clockwise, one-quarter turn. Click on the Clue Button for the image solution. Keep working back and forth until the colors are in the correct locations.

Collect 5 Puzzle Pieces, click on the Cabinet Door (1) and collect the Puzzle Piece. Click on the Astrolabe (2) and the Display Panel (3), collect the Dial (yellow) and then click on the Elevator (4).

Collect the Dial, click on the Camera (1), collect the Compass (2 – blue) and then click on the Right Door (3). Collect the Dial, click on the Left Door (4) and then click on next the Left Door (5). Collect the Dial (6) and then return upstairs (click on the Right Door and then the Elevator).

Use the Compass on the Astrolabe (1). The object is to align all 3 parts of the Astrolabe. Click and drag the Compass (2 – large circle), in either direction (clockwise or counter-clockwise). It will take about 3 and one-half counter-clockwise rotations to get them to line up.
Click on the Papers (3), collect the Cipher Key (4) and use it on the Papers. Click and drag the Cipher Key over the grid until it lines up with numbers that result in the 2 you’re given (5). Click on the Clue Button for a hint. The solution is that all the numbers are results of subtraction: 3 1 3 2.
Use the Dials on the Display Panel (6) and click on the Dials to enter the number (7). Collect the Apple (8), click on the Elevator (9) and then click on the Right Door.

Use the Apples in the Display Case (1), collect the Coin (pink), click on the Right Door (2) and then continue outside (click on the next Right Door).

Use the Coin on the Ticket Counter (1), return upstairs (click on the Left Door and then click on the Elevator) and then click on the large Monitor (2).

The object is to guide the Plane to the Landing Strip (1), using the Controls. Use the Left and Right Arrows (2) to move your Plane along the path, avoiding trees and enemies; the Plane will move forward on its own. If you crash into trees or an enemy, the game will reset and you’ll have to begin again.

Click on the following for the video solution.
Return outside (click on the Elevator and then click on the Right Door) and click on the Orange Button (1). Click on the Cargo Door (2), click on the Compartment (3), collect 3 Packages and then click on the Left Door (4).

Collect 2 Packages, click on the Camera (1), collect the Package (2) and then click on the Left Door (3).

Collect 3 Packages, click on the Drawer (1), collect the Package, click on the Right Door (2) and then return upstairs (click on the Elevator).

Collect the Package and click on the Cabinet Door (1). Collect the Package, click on the Elevator (2) and then return outside (click on the Right Door).

Use the Packages on the Cargo Door.

Reconstruct the next area with the Puzzle Pieces and then click on Continue.

Level 4
Collect 5 Puzzle Pieces, click on the Scale (1) and collect 6 Pieces of Luggage (yellow). Click on the Compartment (2), collect the Piece of Luggage and then click on the Door (3 – click twice).

Collect 3 Puzzle Pieces and 3 Pieces of Luggage.

Use the Luggage on the Scale (1). When complete, click on the Right Arrow (2).

The object is to balance the Scale by placing the Pieces of Luggage on both sides. Click and drag each piece of Luggage to either side of the Scale until it balances. Note that there is more than one solution.

Collect 3 Puzzle Pieces and click on the Device (1). Click on the Door (2), collect the Puzzle Piece, click on the Hatch (3), collect the Puzzle Piece and then click on the Right Arrow (4).

Collect 5 Puzzle Pieces and the Die (blue), click on the Broken Carving (1) and click on the Lock (2). Collect the Carving Piece (orange) and then click on the Left Arrow (3).

Collect the Carving Piece, click on the Left Arrow (1), collect the Carving Piece, click on the Hatch (2), collect the Die and then click on the Door (3 – click twice). Collect the Die and the Carving Piece (4) and then return to the Dock (click on the next 2 Right Arrows).

Use the Carving Pieces on the Broken Carving (1). The object is to reassemble the image (2). Click and drag each piece into position. Once placed correctly they will lock into place; there’s no need to rotate the pieces. Click on either Door (3), collect 2 Puzzle Pieces and the Die (4) and then click on the Left Arrow (5).

Use the Dice on the Device (1). When complete, click the Green Lever (2) and then click on the Ladder (3).

The object is to move each Die into its matching colored space. Click on any Die, with a direct path to the empty space, and it will slide into it. The starting configuration and solution are always the same. The solution is:
- Move the Red Die to the Yellow Space
- Move the Green Die to the Red Space
- Move the Blue Die to the Center Space
- Move the Yellow Die to the Blue Space
- Move the Green Die to the Green Space
- Move the Red Die to the Red Space
- Move the Yellow Die to the Yellow Space
- Move the Blue Die to the Blue Space

Click on the following for the video solution.
Collect the 3 Puzzle Pieces and click on the Torn Map (1) and the Tackle Box (2). Click on the Armoire Door (3), collect the Puzzle Piece and the Bobber (pink), click on the Wardrobe Door (4), collect the Puzzle Piece and then click on the Ladder (5).

Collect the Ship Pin (yellow), click on the Manhole Cover (1) and collect the Ship Pin. Click on the Hatch Cover (2), collect the Bobber, click on the Compartment (3), collect the Bobber, Click on the Crank (4), collect the Bobber and then click on the Left Arrow (5).

Collect the Ship Pin and the Bobber and then click on the Door (1). Collect the Ship Pin and the Bobber (2), click on the Right Arrow (3) and then continue to the Dock (click on the next Right Arrow).

Collect the 2 Ship Pins and the Bobber, click on the Hatch (1) and collect the Bobber. Click on either Door (2), collect the 2 Ship Pins and 2 Bobbers (3), click on the Left Arrow (4) and then continue upstairs (click on the Ladder).

Use the Bobbers on the Tackle Box (1). When complete, collect the Map Piece, use it on the Map Piece and then use the Ship Pins on the Map (2 – in that order).

The object is to fit all the Tackle Pieces into the Box. Click and drag each piece onto the grid; note that none of the pieces will lock into place until you place the final one.

The object is to trace a path connecting the 2 Ships of the same color, without crossing the paths of any other Ships. Click on a Ship and then drag a path to the matching Ship. Repeat for all 4 pairs of Ships. If you make a mistake, either let go of your mouse button (if you haven’t finished a path) or click on one of the 2 Ships (this will erase a completed path).

Collect the Key, click on the Ladder (1), continue to the Dock (click on the Right Arrow) and then use the Key in the Lock (2).

Reconstruct the next area with the Puzzle Pieces and then click on Continue.

Level 5
Collect 5 Puzzle Pieces, click on the Mechanical Room (1) and then collect the Valve Wheel (yellow). Click on the Trap Door (2), collect the Valve Wheel and then click on the Glass Doors (3 – click twice).

Collect 5 Puzzle Pieces and the Valve Wheel and then click on the Portrait (1) and the Locked Doors (2). Collect 4 Portrait Tiles (blue), click on the Fountain (3), collect the Valve Wheel and Portrait Tile (4) and then click on the Glass Doors (5 – click twice).

Collect 5 Portrait Tiles and then return inside (click on the Glass Doors).

Use the Portrait Tiles on the Portrait (1). When complete, collect the Valve Wheel and then click on the Glass Doors (2 – click twice).

The object is to restore the Portrait. Click on one of the highlighted Spaces to place your first Tile. You must choose one of the next set of highlighted Spaces to continue. If you run into a dead end, click the Cancel button and restart the Puzzle. In the solution image, start at 1 and end at 2.

Click on the following for a video solution.
Use the Valve Wheels on the Mechanical (1). When complete, click on the Glass Doors (2).

The object is to place the Valve Wheels on the correct Stems, to shut off the Water. Click and drag a Valve (1) to one of the Stems (2). When placed correctly, the Water Indicators (3) will turn from Blue (water running) to Black (no water running).

Click on the Fountain (1), collect the 2 Puzzles Pieces and the Key (2), use the Key on the Door (3) and then click on the Stairs (4).

Collect 4 Puzzle Pieces and click on the Left Stairs.

Collect 5 Puzzle Pieces, click on the Clock (1), click on the Wall Cabinet (2) and collect the Roman Numeral (yellow). Click on the Game Board (3), collect 3 Puzzle Pieces (4) and then click on the Stairs (5).

Collect 2 Roman Numerals and click on the Safe (1). Click on the inner (red) and outer (grey) Dials (2) to enter the correct Numbers (3 – the clue from the Game Board: B1 and C3). Collect the Clock Hand and then click on the Right Stairs (4).

Collect 3 Roman Numerals, click on the Fountain (1), collect the Roman Numeral and the Clock Hand (2) and then click on the Glass Doors (3).

Collect 3 Roman Numerals, return inside (click on the Glass Doors) and then continue up to the Attic (click on the Stairs and then click on the Left Stairs).

Use the Roman Numerals and Clock Hands on the Clock (1 – in either order), click on the Stairs (2) and collect the Puzzle Piece (3).

Reconstruct the rest of Tiny Planet with the Puzzle Pieces and then click on Continue.

Click on the Victrola (1) to listen to random music from the game, click on the Right Arrow (2) and click on any one of the 20 Puzzles/Minigames (3) to replay them.

Congratulations! You’ve completed and restored the Tiny Planet.